Many years ago when I was first introduced to Google Workspace (formerly GSuite), I was not convinced it was such a great thing, I loved using my traditional products and I didn’t want to change anything. That was…until I got a classroom set of netbooks and began teaching in a 1:1 environment. I discovered that Google Workspace was so much more than productivity tools. There was a whole other level of collaboration that could happen when using Google Workspace, not only could we develop group projects, but then we could then easily share our work and receive immediate feedback. Now more than 10 years later I use Google Apps exclusively both professionally and personally. I love that I can access a file whenever I need it even if I don’t have my computer, that any work I complete is automatically saved and that I can easily work with others. Below you will find some of my top tips for using Google Workspace!
Tips to consider when using Google Workspace:
1. Utilize the Collaboration Features

The most powerful feature of Google Workspace is the ability to collaborate, both synchronously and asynchronously. You can create, edit, and chat even if everyone is in different locations.
There are three ways to do this:
- Work on a project in real time. You can have a number of people on one document at the same time making changes and you will see their changes as they are making them. One of my favorite things to do in an online live meeting is create a guide/template in a shared Google Doc and ask everyone at the meeting to contribute to it. It’s a great opportunity for all voices to be heard.
- Any user signed into a gmail account can use the chat feature alongside the document. This allows you to work synchronously with other collaborators.
- If you are working asynchronously then you can also leave comments. Users can reply to specific comments or add their own as well.
2. Practice Netiquette
One thing to keep in mind when collaborating on a document or project with someone is that at times you will be editing someone else’s work. Be sure to establish guidelines with your group or partner to determine how changes will be made, when and if the group should be notified when changes are made, and how everyone will communicate. When introducing these tools to students, have norm setting conversations to be sure they all know the expectations. This is also a great opportunity to have discussions with students around digital citizenship and for students to practice using those skills in a private, monitored space.
3. Know the Share Settings
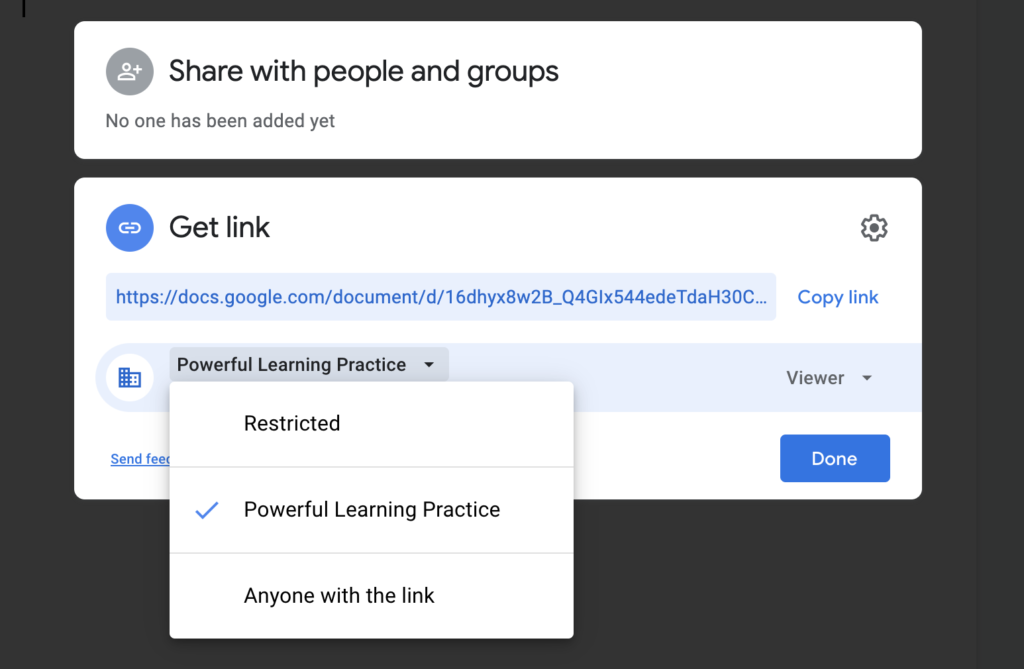
In order to collaborate with others, you will need to share your project. Google Workspace provides you with several options for sharing your projects.
- Share with specific individuals by adding their email addresses. Individuals will need a Gmail account in order to edit the document.
- Create a live link, anyone with the link can access the document. Be sure to keep in mind that the link can be passed on, so you never know who will be viewing the document. If you send the link to someone, they do not need a Gmail account in order to edit the document. Click here to see even more share options via a link.
- Make your project a public webpage, which can show up in search results. When you publish to the web, this also allows your document to be embedded into a blog or site.
- You can share within your organization only, this means that only people in your district or school would be able to access the document. (They would have to be signed into their Google Apps for Education account.)
When you are determining how to share, be sure to think about the content and purpose of your document. If you have information in the project that you would not want passed around, consider sharing with specific people and ensure that they can not change the share settings.
4. Utilize folders to organize
As you begin to use your Google Workspace account more and more, you are probably going to want to keep things organized. You can create folders within folders, share whole folders, name and color code them as well. The ability to share folders also allows for more organization within projects and ensures that everyone can access all of the documents they need.
5. Save time with templates

Need to organize information or create a project using Google Workspace? One way to save time is to use templates. Each app has their own set of templates, when you go to create a new file you can select “from template” ‘and explore the template gallery. Two other options for Google Slides include Slidemania and Slidescarnival. Be sure to explore Hyperdocs as well, you’ll find many ready made resources and templates!
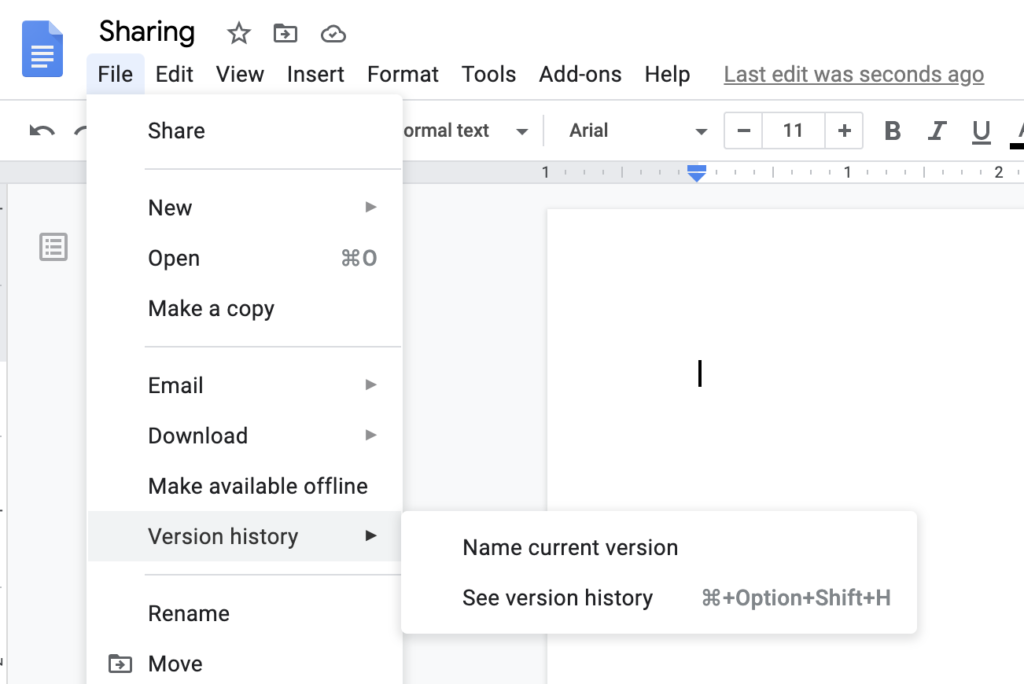
6. Use the Revision History
The revision history allows you to see who made what changes and when. This is very helpful when you have several people editing and developing a project, as you can see who has contributed the different aspects of the project. Another useful feature of revision history is that if there has been a mistake made, you can always revert back to any of the versions listed.
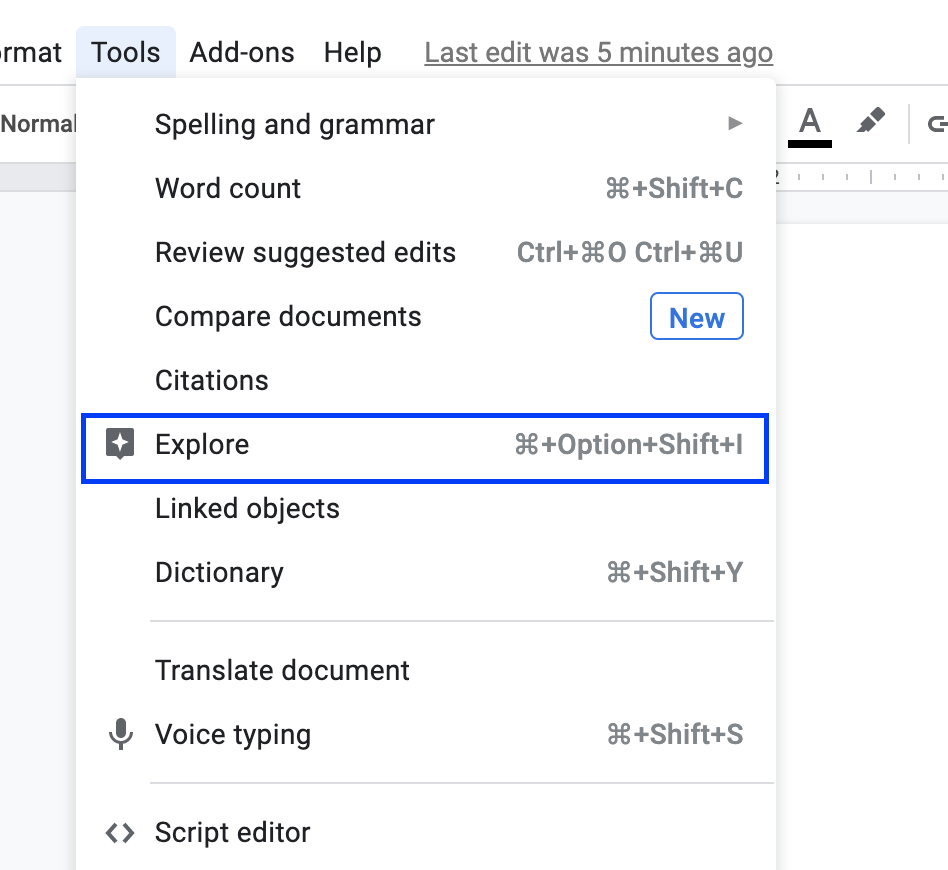
7. Use the Explore Tool
The Explore tools allows you to research a topic or find pictures without even leaving your document! Use the Tool menu, select “Explore” and type your keyword in the search bar. It will search the internet, your drive and images related to the key word. If needed, it will also automatically add a citation or link for you! When you use the Explore tool in Google Sheets it will also provide insights to the data in the sheet!
8. Be adaptive
As with any web tool, things are probably going to change. Google is constantly adding features, adjusting layouts and making changes, so keep that in mind as you use this tool.
Let us know below, what is your top tip for using Google Workspace?
Wondering how to make the most of Google Workspace? Or looking for some specific, how to guidance with using and infusing it in the classroom? PLP offers a Connected Classroom Course Bundle that includes everything you need to get started! Plus it’s 50% off through December 31st! That means 7-self-paced courses for only $74.50!
Courses include:
- Google Docs for the Connected Classroom
- Google Slides for the Connected Classroom
- Google Sheets for the Connected Classroom
- Google Forms for the Connected Classroom
- Twitter for the Connected Classroom
- Google Sites for the Connected Classroom
- Getting Started with Google Drive and Calendar